Why Is My Chicken Rubbery? Causes & How to Fix It
Rubbery chicken is one of the most common problems in home cooking. A chicken breast can look beautifully browned on the outside yet feel dry, dense, and strangely chewy when you cut into it. Sometimes the opposite happens: the surface looks pale and firm while the center remains soft and undercooked.
The good news is that “rubbery chicken” is not a single cooking problem. The texture can come from excessive moisture loss, prolonged exposure to heat, insufficient cooking, uneven thickness, or even structural abnormalities that were already present in the raw meat.
Understanding these causes makes the problem much easier to diagnose.
Chicken muscle is largely composed of water, proteins, connective tissue, and smaller amounts of fat and other components. When heat is applied, muscle proteins denature and change their structure. As temperature increases, the muscle fibers contract and their ability to retain water changes. Cooking time matters just as much as temperature because prolonged heating continues to alter the muscle structure and increase cooking losses [1][2].
That is why tender chicken is not simply a matter of “cooking it until it is done.” Good results depend on controlling temperature, time, thickness, moisture, and the characteristics of the meat itself.
What Makes Chicken Rubbery?

There are several different textures that people describe as “rubbery,” and identifying which one you have is the first step toward fixing it.
1. Dry and Chewy Chicken: Usually a Heat-and-Moisture Problem
Chicken breast is particularly vulnerable to overcooking because it contains relatively little fat and has a high proportion of lean muscle.
As the meat heats, proteins such as myosin and actin denature and change their arrangement. Continued heating causes the muscle structure to contract further. At the same time, water is lost from the tissue, increasing cooking loss and making the meat progressively firmer and drier [1][2].
The result is familiar: a piece of chicken that is technically cooked but difficult to chew.
This is why temperature alone does not tell the whole story. Cooking a chicken breast to a safe internal temperature is necessary, but holding it at a substantially higher temperature for a long period can produce a very different texture from reaching the same safety target quickly.
Research on chicken breast has found that cooking temperature and cooking time both influence cooking loss and other physicochemical properties of the meat [2].
In practical terms, hotter and longer is not automatically better.

2. Soft, Glossy, or Rubbery Chicken: It May Be Undercooked
Not every unpleasant chicken texture comes from overcooking.
Chicken that has not reached a safe internal temperature can remain soft, glossy, translucent, or unusually gelatinous in the center. The proteins have not undergone enough heat-induced structural change to produce the familiar texture of cooked poultry.
More importantly, undercooked chicken presents a food-safety risk. Raw poultry can carry pathogens including Salmonella and Campylobacter, which can cause foodborne illness [3].
For home cooking, the USDA recommends cooking poultry to a minimum internal temperature of 165°F (74°C), measured with a food thermometer [4]. Color alone is not a dependable measure of safety.
A chicken breast can remain slightly pink after reaching a safe temperature, while another piece can look completely white before the center has reached the recommended temperature.
Use temperature rather than appearance as the primary doneness check.
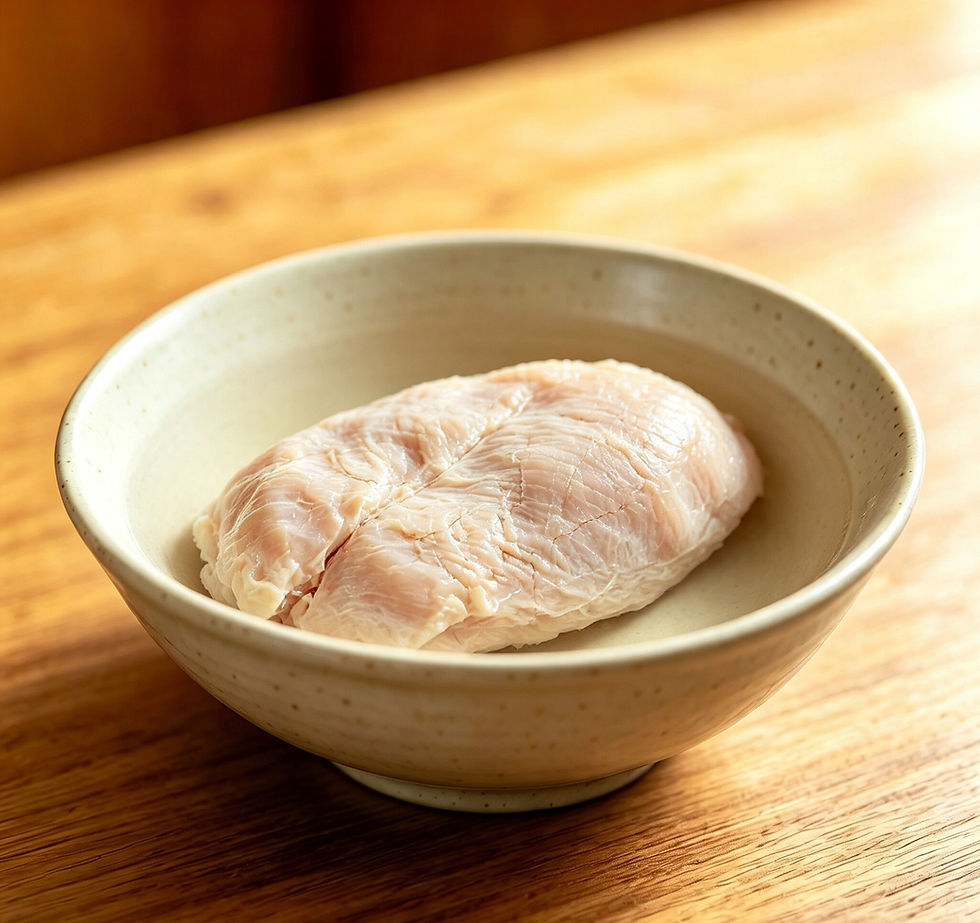
The Chicken Itself Can Sometimes Be the Problem
One of the most important developments in understanding tough chicken is the recognition that not every texture defect is caused in the kitchen.
Modern broiler chickens can develop breast muscle abnormalities commonly referred to as woody breast and white striping. These conditions affect meat quality and can produce unusually firm or coarse textures even when the chicken is cooked correctly [5][6].
What Is White Striping?
White striping appears as visible white lines running parallel to the muscle fibers of the breast.
These areas are associated with changes in muscle tissue, including increased fat and connective tissue and other structural alterations. Studies have found that more severe white striping can be associated with poorer technological and sensory properties of breast meat [5][6].
A few white lines do not automatically mean that chicken is unsafe. The issue is primarily one of meat quality and texture.
What Is Woody Breast?
Woody breast is different from simple overcooking.
Affected raw breast fillets can feel unusually hard or rigid. After cooking, the meat may remain firm, chewy, or unpleasantly dense.
Research has linked woody breast with muscle degeneration, fibrosis, changes in connective tissue, and impaired water-holding properties [5][7].
The causes are not completely settled. Scientific reviews have identified associations with rapid growth, heavier broilers, and selection for high breast-meat yield, but the biological mechanism is more complicated than simply saying that “fast-growing chickens develop woody breast because their muscles do not receive enough oxygen” [5].
That distinction matters because it prevents a common mistake: blaming the cook for a structural problem that was already present in the raw chicken.
How Can You Recognize It?
Severe woody breast can sometimes be identified by the unusually hard texture of a raw fillet. White striping may be visible as white streaks across the surface.
However, appearance is not a perfect diagnostic tool. The severity of these conditions varies, and not every unusual-looking breast will produce the same cooked texture [5][6].
For consumers, the practical approach is simple:
-
Avoid obviously damaged or unusually hard fillets when possible.
-
If one package consistently produces unusually tough breast meat despite careful cooking, try a different product or cut.
-
Do not assume that paying more automatically guarantees tenderness.
-
Remember that sourcing can influence meat characteristics, but it does not eliminate the possibility of texture defects.
Why Chicken Breast Is Easier to Overcook Than Thighs
Not all chicken cuts behave the same way.
Chicken breast is lean and relatively low in intramuscular fat. Chicken thighs contain more fat and connective tissue, giving them a different texture and greater tolerance for prolonged cooking.
This difference explains why a chicken breast can become dry relatively quickly while a thigh may remain succulent through longer cooking.
It also explains why cooking instructions should be adapted to the cut rather than treating “chicken” as one uniform ingredient.
For breast meat, precise temperature control is especially important.
For thighs and other connective-tissue-rich cuts, longer cooking can be appropriate because collagen gradually converts into gelatin during prolonged moist cooking.
The goal is therefore not simply to find one universal cooking time. It is to match temperature and duration to the structure of the cut.

How to Cook Chicken Breast for a Better Texture
The most reliable approach is to control the variables that you can actually control.
1. Start With Even Thickness
Chicken breasts are often much thicker at one end than the other.
If the thickest section takes substantially longer to reach the target temperature, the thinner portion may spend too much time exposed to heat.
Pounding a breast to a more even thickness is therefore useful—not because it makes the meat inherently more tender, but because it reduces the difference in cooking time between the thick and thin sections.
A flatter, more uniform piece also makes pan-searing easier to control.
For cutlets, a relatively even thickness of around 1.5–2 cm can work well, depending on the recipe.
2. Do Not Rely on “Room Temperature” as a Magic Trick
The original version of this article recommended leaving chicken at room temperature for 15–20 minutes.
That advice is unnecessary as a general rule.
The more important food-safety principle is to keep raw poultry refrigerated until you are ready to prepare it. Allowing meat to sit at room temperature does not meaningfully solve the fundamental problem of uneven thickness, and it should not be presented as an essential technique.
If a recipe benefits from tempering ingredients, that should never override safe handling practices.
Instead, control the cooking process through uniform thickness, appropriate heat, and accurate temperature measurement.
3. Consider Brining or Dry-Brining
Salt can improve the eating quality of chicken by influencing the proteins involved in water retention.
USDA guidance explains that salt can interact with muscle proteins and reduce moisture loss during cooking, helping poultry retain more moisture [8].
There are two common approaches.
Wet Brining
Chicken is submerged in a salt-water solution before cooking.
This can increase moisture retention, although the concentration and duration should be controlled carefully. Very salty brines can make meat unpleasantly salty.
Dry Brining
Salt is applied directly to the surface of the chicken and the meat is refrigerated before cooking.
This method seasons the meat without adding a large quantity of water and can be convenient for roasting, grilling, or pan-searing.
The important point is that brining is not a substitute for proper cooking. It can improve moisture retention, but it cannot compensate indefinitely for excessive heat exposure.
4. Use Marinades Carefully
Acidic ingredients such as lemon juice, vinegar, or yogurt can alter proteins near the surface of the meat.
This can affect tenderness and flavor, but “acid breaks down meat and therefore always makes it tender” is too simplistic.
USDA guidance notes that acidic marinades can have a tenderizing effect, while excessive acid or overly long exposure can produce a stringy or tough texture [8].
For chicken breast, the marinade should complement the cooking method rather than serve as a cure-all for overcooking.
The Most Important Tool: A Food Thermometer
The most reliable way to prevent both undercooked and overcooked chicken is to measure its internal temperature.
The USDA recommends a minimum internal temperature of 165°F (74°C) for poultry [4].
Insert the thermometer into the thickest portion of the meat. For a boneless breast, approaching the center from the side can make it easier to locate the coolest point.
Avoid touching the pan or bone with the probe because either can distort the measurement.
Why the Thermometer Matters
A timer tells you how long the chicken has been exposed to heat.
A thermometer tells you what is happening inside the chicken.
Those are not the same thing.
The actual cooking time changes with:
-
thickness
-
starting temperature
-
pan material
-
oven or grill temperature
-
whether the meat is bone-in or boneless
-
whether the cooking environment is dry or moist
-
how much chicken is being cooked at once
That is why “cook chicken for exactly 20 minutes” is much less reliable than using temperature as the primary indicator of doneness.
Common Problems & Solutions
Problem 1: The Outside Is Burned but the Center Is Still Raw
This usually indicates excessive surface heat combined with an unevenly thick piece of chicken.
A very thick breast can require considerable time for heat to reach its center. If the pan or grill is extremely hot, the surface can brown or burn long before the center is ready.
Solution
Flatten the chicken to a more uniform thickness.
For thick breasts, use moderate heat after initial browning rather than keeping the pan at maximum temperature throughout the entire cooking process.
An alternative is to cook the chicken more gently until nearly done, then briefly increase the heat to develop surface color.
Problem 2: The Chicken Is Safe but Extremely Dry
This is usually a moisture-loss problem.
The chicken has reached a safe temperature, but it has spent too much time at elevated heat.
Solution
Use a thermometer and reduce unnecessary cooking time.
Brining or dry-brining can improve moisture retention, but the biggest improvement usually comes from controlling the cooking process itself.
If you routinely cook chicken breast far beyond the recommended minimum temperature, reducing the final temperature while maintaining food-safety requirements can make a noticeable difference.
Problem 3: The Chicken Is Tough Even When Cooked Carefully
If the cooking process is controlled and the chicken remains unusually hard or coarse, consider the possibility of woody breast or another meat-quality issue.
Solution
Inspect the raw fillet before cooking. Very firm breasts or strongly pronounced white striping may indicate a quality defect.
Try a different package, supplier, or cut.
Research shows that woody breast and white striping can negatively affect cooking loss, water-holding capacity, and texture [5][6][7].
Problem 4: The Chicken Looks Pink After It Reaches 165°F
Pink color does not automatically mean that poultry is unsafe.
Pigments in muscle tissue can remain visible after cooking, and color can vary according to the bird, cut, cooking method, and other factors.
Solution
Check the internal temperature rather than judging doneness by color alone.
If the thickest portion has reached the recommended temperature measured with a properly used food thermometer, the temperature measurement is more informative than visual color.
Problem 5: The Chicken Becomes Rubbery After Reheating
Reheating can create a second round of moisture loss.
Chicken that was perfectly cooked the first time can become dry and chewy if it is exposed to high heat for too long during reheating.
Solution
Reheat gently.
Adding a small amount of broth, sauce, or water and covering the container can help reduce moisture loss. Heat only until the chicken is warmed through rather than continuing to cook it aggressively.
For leftover chicken, texture is often better when the meat is incorporated into a sauce, soup, curry, grain bowl, or other moist preparation.
Can Rubbery Chicken Be Saved?
Sometimes—but there is an important limitation.
Once chicken has been significantly overcooked, you cannot simply “put the moisture back” into the muscle fibers.
The structural changes caused by heating are not fully reversible.
What you can do is change how the meat is eaten.
Shred It
Shredding reduces the size of the pieces that need to be chewed and changes the perceived texture.
It works particularly well when the chicken is combined with sauce.
Add Moisture and Fat
A sauce can compensate for some of the dryness by coating the meat and adding moisture and fat to each bite.
Good options include:
-
chicken broth
-
tomato-based sauces
-
barbecue sauce
-
curry sauces
-
creamy mushroom sauce
-
vinaigrettes
-
yogurt-based sauces
The sauce does not reverse the cooking damage. It simply changes the eating experience.
Turn It Into Something Else
Overcooked chicken is often more successful as an ingredient than as a standalone protein.
Try it in:
-
tacos
-
enchiladas
-
chicken salad
-
soup
-
fried rice
-
sandwiches
-
pasta
-
pot pie
-
dumpling fillings
The key is to stop expecting the chicken to have the texture of perfectly cooked chicken breast.
When the Problem Is Not the Recipe
One of the most useful lessons in cooking is knowing which variables you can control.
You can control:
-
cooking temperature
-
cooking time
-
thickness
-
seasoning
-
preparation
-
cooking method
-
internal temperature
You cannot completely control the structural characteristics of every piece of raw chicken.
That distinction becomes especially important with commercial broiler breast meat affected by woody breast or white striping. Research has demonstrated that these conditions can affect water-holding capacity, cooking loss, and instrumental toughness [5][6][7].
So if one chicken breast turns out strangely tough while another, prepared in exactly the same way, is tender and juicy, do not automatically assume that the cooking technique failed.
The raw material matters.
At the same time, it is not accurate to promise that organic, free-range, pasture-raised, or premium chicken will always solve the problem. Production system, genetics, bird size, processing, storage, and individual muscle condition can all influence meat quality.
The most useful consumer strategy is therefore to pay attention to the actual product rather than relying on a single marketing label.
A Better Way to Think About Chicken Texture
The goal is not to memorize one magic temperature or one perfect cooking method.
Think about chicken as a combination of structure, heat, moisture, and time.
A thin chicken cutlet cooks quickly because heat has a short distance to travel.
A thick breast takes longer because its center is farther from the heat source.
A lean breast loses quality quickly when it is held at high temperatures for too long.
A thigh behaves differently because its muscle composition and connective tissue structure are different.
Brining can improve water retention.
Marinades can change surface proteins and flavor.
A thermometer tells you what is happening at the center.
And the condition of the raw meat determines part of the texture before cooking even begins.
Once these factors are understood, “rubbery chicken” stops being a mysterious kitchen failure. It becomes a problem that can usually be diagnosed.
Final Takeaway
Tender chicken does not come from one secret trick.
It comes from controlling the variables that matter: choose an appropriate cut, keep the thickness reasonably even, avoid unnecessary heat exposure, use seasoning or brining when useful, and check the internal temperature with a thermometer.
If the chicken is still unusually firm after careful cooking, consider the possibility that the meat itself has a quality defect such as woody breast rather than assuming the recipe is at fault.
And when a batch is already overcooked, do not expect a sauce or marinade to reverse the structural changes. Instead, shred it, combine it with moisture, or use it in a dish where the texture is less exposed.
The next piece of chicken will give you another opportunity to control the variables—and this time, the thermometer can tell you when to stop.
References
[1] ThermoWorks. How Meat Cooks: The Effects of Heat on Muscle Fibers.
ThermoWorks — How Meat Cooks: The Effects of Heat on Muscle Fibers
[2] Noh, S. W., et al. (2023). Physicochemical Properties of Chicken Breast and Thigh Muscles as Affected by Cooking Temperature and Time. Foods, 12(13), 2592.
Foods — Physicochemical Properties of Chicken Breast and Thigh Muscles as Affected by Cooking Temperature and Time
[3] Centers for Disease Control and Prevention. Chicken and Food Poisoning.
CDC — Chicken and Food Poisoning
[4] USDA Food Safety and Inspection Service. Safe Minimum Internal Temperature Chart.
USDA FSIS — Safe Minimum Internal Temperature Chart
[5] Kuttappan, V. A., et al. (2016). White Striping and Woody Breast Myopathies in the Modern Poultry Industry: A Review. Poultry Science, 95(11), 2724–2733.
Oxford Academic — White Striping and Woody Breast Myopathies in the Modern Poultry Industry
[6] Tasoniero, G., et al. (2016). Technological Quality, Mineral Profile, and Sensory Attributes of Broiler Chicken Breasts Affected by White Striping and Wooden Breast Myopathies. Poultry Science, 95(11), 2707–2714.
Oxford Academic — Technological Quality, Mineral Profile, and Sensory Attributes of Broiler Chicken Breasts
[7] Petracci, M., et al. (2016). Histology, Composition, and Quality Traits of Chicken Pectoralis Major Muscle Affected by Wooden Breast Abnormality. Poultry Science, 95(3), 651–659.
Oxford Academic — Histology, Composition, and Quality Traits of Chicken Pectoralis Major Muscle
[8] USDA Food Safety and Inspection Service. Poultry: Basting, Brining, and Marinating.
USDA FSIS — Poultry: Basting, Brining, and Marinating
FAQ
1. After cooking, turn off the heat and let it simmer for 3-5 minutes. Do not simmer for too long.
2. Slice the chicken just before eating, cutting across the grain.
3. Store the stewed chicken with the broth; do not drain or let it cool.
No. The amount of water only affects the amount of soup; time and heat are the key factors. No matter how much water you add, it will still boil dry over high heat.

About KIRA
KIRA is a home baker, a seasoned enthusiast of borderless casual dining, and a writer specializing in international cuisine. She has many years of practical experience in making various international dishes, controlling the resting time of sauces and fillings, and blending unique seasonings from around the world.
Each article revolves around real-world food preparation challenges: which exotic side dishes are prone to becoming watery and spoiling, which fillings should be sealed separately, and how baking time affects the texture and flavor of baked goods.


